Looking for Nata Drawing Sketches?

Perhaps, you are an Architecture Aspirant looking for drawing questions asked in Nata exam.
But, this web page does not provide you anything of the sort.
Wait, wait……..
Don’t log off
I have something better to offer
Keep reading…..
There is a lot of content on the web related to Nata Exam Sketches
Even this blog at Mosaic also has dedicated a lot of pages to this topic.
You can visit Nata Sketching Questions with Answers and Nata Sketching Questions to find more.
Since this was a widely covered topic, so I thought of coming up with something that has not been shared much before….
Today, I’ll cover 9 handmade perspectives from my portfolio.
You may ask….
What’s the use?
My dear friend, it’s a sneak peak into the kind of work design & B.Arch students do, once they get admission in their respective colleges.
Mostly for Nata exams, students are not required to fill in colours…..
Only pencil rendering is required
Even when colours are required, only dry mediums are allowed.
But all of the following perspectives were painted in water colours, rendered with pencil colours and outlined with Rotring Isograph Ink Pens 0.3mm and 0.2mm.
This was way back in 97.
I studied Interior Design and made dozens of such perspectives during my student life.
They are part of various Design Projects during my course.
These have found a prestigious place in my portfolio, duly laminated and preserved with pride, even 24 years after its inception.
Hand Rendered Perspectives
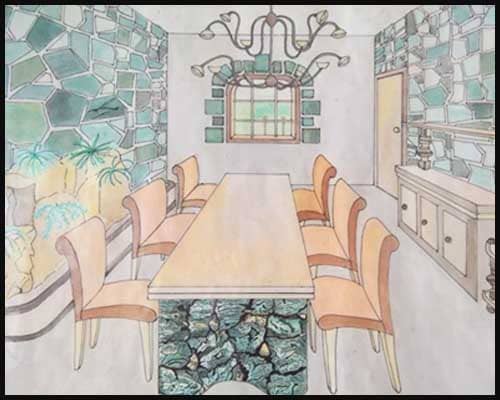
Hand Drawn Perspectives have a different charm to them.
It took me 15 hours to prepare the above Perspective Drawing,
Perspective making is a perfect amalgamation of technical and creative skills.
And that is why it is such an important part of B.Arch entrance exams.
Perspective Drawing Sketch
Back in the late 90’s, we did not had access to internet.
I know, it’s hard to believe a life without internet today but such times did exist.
As a student, we did not had many sources to take inspiration from, except for a few design digests
Perspective Drawing Interior Design
.jpg)
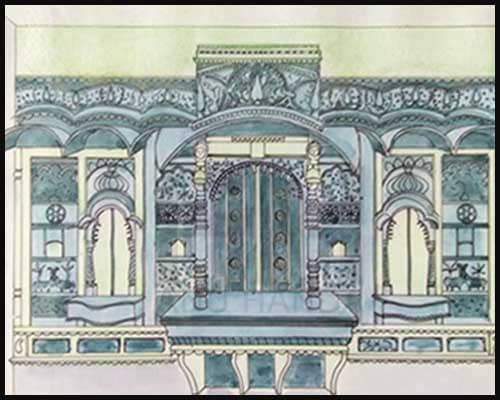
Perspective making was a very time consuming process…..
First, you have to draw the perspective on an Ivory Sheet
This has to be done very lightly as the blackness of the lead can spoil the tone of the colours later.
Then, you clean the whole sheet with a piece of bread.
With a piece of bread?
Yes, you read it right…..
The bread actually absorbs all the extra marks & unnecessary stains on the sheet.
This also lightens your drawing, but it’s still visible.
And then you need to throw away the bread.
More to Explore...

NATA Study Material
NATA Books: Available in Full, Mini, Combo & Test Series Pack. Doorstep delivery across India.
Details
NATA eBooks
Study at Home with Nata eBooks! Instant Download. Saves Time. Learn at your own pace!
Details
NATA Video Pack
NATA Video Pack: Engaging Video Lessons supported by E-Books. Instant Downloadable.
Details
NATA Free Online Test
Free NATA Online Test based on Nata Exam Pattern - Includes Timer, Detailed Results & Answer Key.
Details
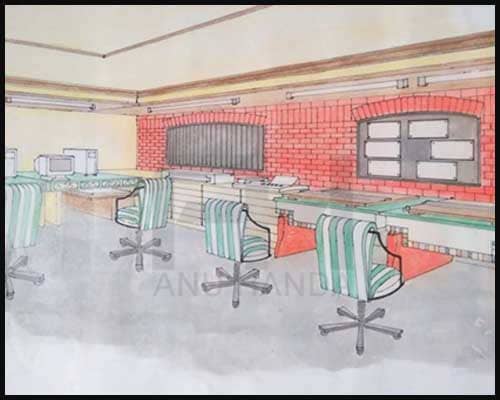
Then you outline the perspective with Rotring pens
Give a diluted coat of watercolours…….
Then render in watercolours………
The Rotring inks are waterproofs so using watercolours will not smudge your work.
Also the thickness of the ivory sheet helps in absorbing the extra moisture of the paints.
Let it dry (This takes time)
Then finally render in pencil colours.
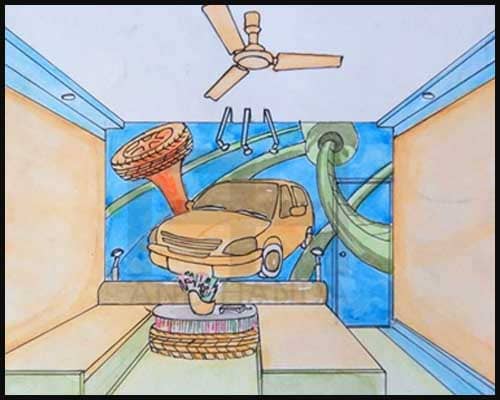
Perspective Drawing Examples
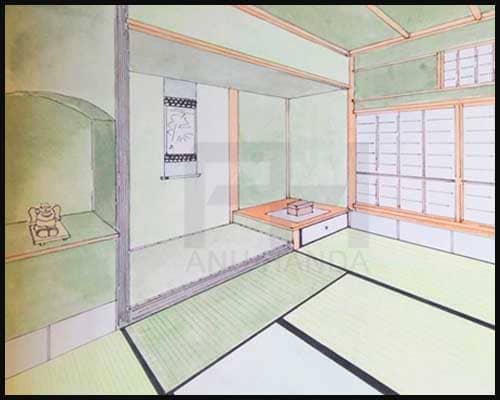
The above perspective shows a traditional Japanese room and was created as part of my first year History Project.
Over the years, the colours have become dull and the ink has lost its luminance.
Preserving and protecting them from moisture was another issue so I got most of them laminated.
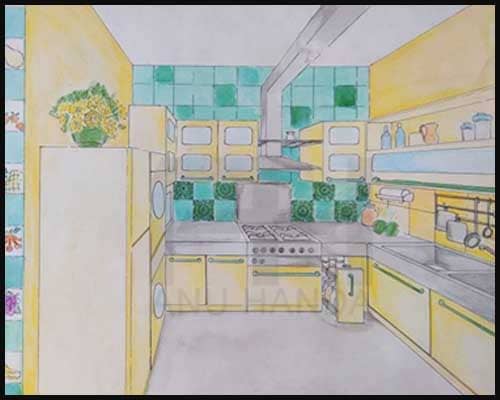
Perspective Drawing 3D
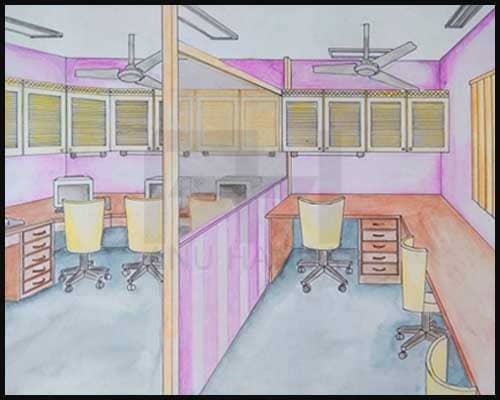
Notice, how the glass in the above partition is rendered with a mild grey. This is only possible with a transparent medium like watercolours. Also notice the variation in rendering of cabinets seen through the glass and otherwise. Also notice how the corners are rendered darker than other areas, this is done to give a feeling of depth in a room.
These small nuances and attention to detail while rendering helps you to gain those extra bonus points in the Nata Drawing Exam. Probably that is the differentiating factor between the best and the average perspective drawing in the exam.
Perspective Drawing Room
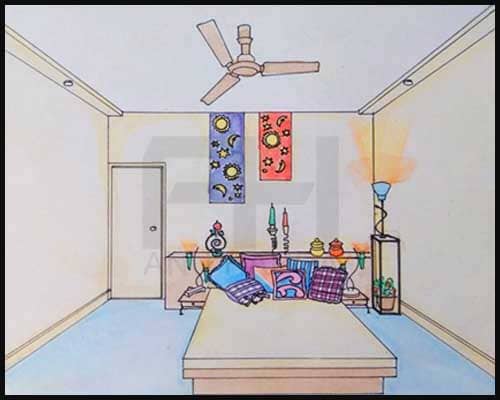
Before the Nata exam, students fret a lot on what brand colours to choose for the exam. My experience in this regard says that skill is more important than the quality of colours here.
I would not like to take any brand name’s here, but all the above perspectives were made on a budget with student level beginners pack……both for watercolours and pencil colours.
If you can afford good quality stationary and colours, go for it.
If you can’t, it’s ok, just work on improving your drawing skills.
Perspective Drawing Images
I was exceptionally good in making perspectives.
But, slowly computers took over, and handmade stuff took a back seat.
Almost after a span of 10 years, I got a chance to practice my skill once again.
In the last 15 years, I have taught perspectives to thousands of students across India and abroad.
I myself made thousands of them….on paper…. in pencil…. in colours…..on board…..with markers.
Perspective in Drawing
After consistent practice of many years, now I can make a perspective in 15 minutes.
Ok, no kidding….not the one in the pic above……
But yes, I can draw a raw perspective within 15 minutes.
Finishing within the time limits has extraordinary advantage in the exams.
This one factor can help the students with their Nata Scores.
Perspective Drawing Activity
Practicing for so long, helped me finally to crack the code……..and teach my students how to make one under 15 minutes……freehand…..without using scale…..without measurements………
When you teach your students, they are not the only ones learning.
You also learn, every single day……….
To be a better version of yourself.
To strive for perfection.
To reach for the stars.
To be a better teacher.
Cheers,

Related Posts


Comments ( 0 )
Post comment
Login to create a comment

If ART thrills you & DESIGN is your passion, then this is the place for you. The pot is brimming - Gulp Down & Quench your thirst for creativity. Beat the competition with the best in the industry – MOSAIC. You’ll not find boring routine stuff here - this page aims to become a mini design encyclopedia in days to come. It’s the thought which led to the birth of this page. So Fasten your seatbelts & get ready for a roller coaster ride. … Stay updated with admission news & info on premier Design / Architecture schools mainly NID / NIFT / NATA / CEPT / CEED / JEE B.Arch
BlogPost in Mail
Sign up for our free newsletter. Get blog posts as soon as they are published !
Popular Posts
- NATA 2017 ANSWER KEY - Views (101133)
- Nata Sample Papers - Views (84746)
- Tips to Answer NID B.Design G.K. Questions - Views (56460)
- 11 Things to Check before buying NATA Study Material 2024 - Views (43005)
- Nata Previous Year Question Paper - Views (33764)
- 4 Variations to answer NID Drawing Questions - Views (33040)